DDR, DDR2 Computer Memory Upgrade
Computer Memory Upgrade Module Install (continued)
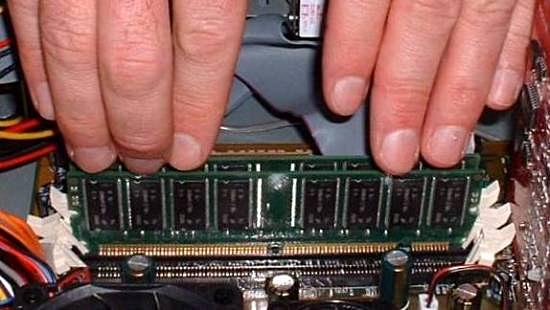
Here's where and how I place my fingers to apply pressure and complete the installation. At this point, no pressure has yet been applied. Notice the locking clips are still in the open - unlocked position and my fingers look relaxed.

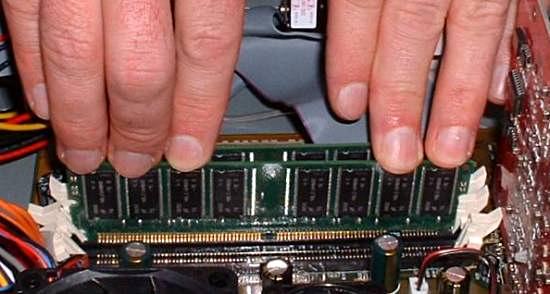
Firm pressure should be applied straight down to insert the memory module into the memory slot, as I am doing here. Although I've tried to place the pressure uniformly across the memory module, notice that the memory module has inserted into the right-hand side of the memory slot first (the right-hand side looking into the picture, but actually the side being pressed by my left-hand). This is perfectly ok. You can see that the locking clip on the right-hand side has moved into the closed - locked position, as it should. But the locking clip on the left-hand side is still in the open - unlocked position. The gold connectors at the base of the memory module on the left-hand side are still in view since that end is not inserted yet. But they disappear by the time you reach the locking clip on the right-hand side since the memory module is inserted at that point.

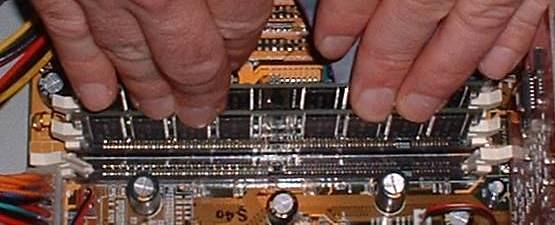
By applying additional firm pressure mostly with my right-hand, the left-hand side (as viewed looking into the picture) of the memory slide inserts into the memory slot. Notice the locking clip on the left-hand side is now in the closed - locked position. Installation of the memory module is complete! That wasn't so bad, was it?

Skip Ahead
© 2001-2010, Rob Williams, all rights reserved.
|

|


